In most professional kitchens you will find kosher salt, if not sea salt and other varieties of salt which are so in vogue nowadays. The passing fad was flavored oils, the new trend is herb salts, spiced salts, and other salts they'll charge you a fortune for but that you could easily throw together in your kitchen for far less.
Kosher salt is my salt of choice for every day cooking. It's available in most supermarkets. The salt itself is not kosher, that is, conforming to Jewish food laws, but because of its large crystal size it is good for absorbing moisture, making it excellent for curing meats. To remove any traces of blood from meat as is often required for making meats kosher, they are often soaked and salted.
Kosher salt contains no iodine, so doesn't provide that metallic taste probably unrecognizable to you if you have been using regular table salt for any length of time. Once you start using it for a few days, however, you will notice that flavors come through more brightly and clearly and aren't muddled by the metallic taste of iodine. The other useful trait of kosher salt is its large crystals. It's easy to pick up a pinch in between your fingers to salt food, and you'll get a feel for just how much you need once you start using it on a regular basis. Try it, you'll like it.
Tuesday, December 19, 2006
Monday, December 18, 2006
Build Your Own Chocolate Vibrating Table
Ok, I know this post isn't for everybody. Most people don't make chocolate at home or lust after arcane, highly specialized pieces of pastry equipment. This particular piece of equipment is used to vibrate chocolate molds used for making pralines or molded figures, in order to rattle out any air bubbles that might be present and give you a perfect mold. The cheapest one I could find on the web was $130 at chefrubber.com; from there it just goes up.
I found this web site with a do-it-yourself project on how to build your own; I had been tossing this idea around in my head trying to figure out how I might build my own without needing an engineering degree and a factory in China to build it for me. So this web site set me on my way. However, I think this guy's idea was more for working with dental and hobby molds, rather than chocolate. Not that it made a lot of difference. Anway, let's get started.
First, I went to Bed, Bath, and Beyond looking for a vibrating massager like the one shown on the above-referenced website. I couldn't find any plug-in ones, just battery powered ones. I opted for this $9.99 foot massager which has little hard nubbies all over the surface, with a half-dome shape. You press down on it to start it vibrating. I had initially thought about using a power tool like a sander, but I found this had already been tried and they vibrate too forcefully, as well as generate a lot of noise. This item uses two AA batteries, which I figure will give me a couple of hours of vibration. You only need to vibrate a filled mold a few seconds so changing out the batteries every couple weeks won't be too much trouble.
I also got a $12.99 cutting board measuring about 9" x 16", which will be the top of the vibrating table.
In order to attach the massager to the table, I used some heavy duty velcro to attach it to the bottom. I didn't see the need for the industrial strength pipe fasteners used on the other website. I attached corresponding pieces of velcro to the bottom of the cutting board.
I then went to Jo-Ann fabrics and got a 9" x 16" x 4" piece of foam for about $10. They'll cut it for you there, but if you need to do additional trimming, an electric knife is the thing to use. I did trim my down a bit so it wouldn't stick out past the edges of my cutting board "table top".
Then with a knife I dug out a rudimentary hole in the foam in which my massage device, attached to the table top by the velcro, would fit. So basically, as you can see in the photo, the massager is upside down attached to the table by velcro, and then lies in the hole in the foam. You have to dig out the foam hole deep enough so that the cutting board/table top is just flush with the foam.
To finish, I bought a $2 piece of poster board at A.C. Moore and glued it to the bottom of the foam, in order to give it a firmer base and a surface that could be wiped clean. You could use a piece of plastic shelving or whatever else you think might work.
Since working with chocolate can be a bit messy, I opted to wrap my foam block in plastic wrap to protect it. Then I just lay my board with built in vibrating device on top, press down, and voila, vibrating table.
So my total cost for the project was $12.99 for the cutting board, $9.99 for the massage device, $2 for the velcro, $11 for the foam, $2 for the poster board, for a grand total of $38, minus the 20% I saved on the cutting board and massage device via Bed, Bath & Beyond coupons. You could even shave off a few more dollars by buying a cheaper top, maybe a cheapie serving tray or just piece of cut plastic. It took me no more than an hour of shopping, and maybe 30 minutes at the most to assemble. What a deal!
I found this web site with a do-it-yourself project on how to build your own; I had been tossing this idea around in my head trying to figure out how I might build my own without needing an engineering degree and a factory in China to build it for me. So this web site set me on my way. However, I think this guy's idea was more for working with dental and hobby molds, rather than chocolate. Not that it made a lot of difference. Anway, let's get started.
First, I went to Bed, Bath, and Beyond looking for a vibrating massager like the one shown on
 the above-referenced website. I couldn't find any plug-in ones, just battery powered ones. I opted for this $9.99 foot massager which has little hard nubbies all over the surface, with a half-dome shape. You press down on it to start it vibrating. I had initially thought about using a power tool like a sander, but I found this had already been tried and they vibrate too forcefully, as well as generate a lot of noise. This item uses two AA batteries, which I figure will give me a couple of hours of vibration. You only need to vibrate a filled mold a few seconds so changing out the batteries every couple weeks won't be too much trouble.
I also got a $12.99 cutting board measuring about 9" x 16", which will be the top of the vibrating table.

In order to attach the massager to the table, I used some heavy duty velcro to attach it to the bottom. I didn't see the need for the industrial strength pipe fasteners used on the other website.
 I attached corresponding pieces of velcro to the bottom of the cutting board.
I then went to Jo-Ann fabrics and got a 9" x 16" x 4" piece of foam for about $10. They'll cut it for you there, but if you need to do additional trimming, an electric knife is the thing to use. I did trim my down a bit so it wouldn't stick out past the edges of my cutting board "table top".

Then with a knife I dug out a rudimentary hole in the foam in which my massage device, attached to the table top by the velcro, would fit. So basically, as you can see in the photo, the massager is upside down attached to the table by velcro, and then lies in the hole in the foam. You have to dig out the foam hole deep enough so that the cutting board/table top is just flush with the foam.

To finish, I bought a $2 piece of poster board at A.C. Moore and glued it to the bottom of the foam, in order to give it a firmer base and a surface that could be wiped clean. You could use a piece of plastic shelving or whatever else you think might work.
Since working with chocolate can be a bit messy, I opted to wrap my foam block in plastic wrap to protect it. Then I just lay my board with built in vibrating device on top, press down, and voila, vibrating table.
So my total cost for the project was $12.99 for the cutting board, $9.99 for the massage device, $2 for the velcro, $11 for the foam, $2 for the poster board, for a grand total of $38, minus the 20% I saved on the cutting board and massage device via Bed, Bath & Beyond coupons. You could even shave off a few more dollars by buying a cheaper top, maybe a cheapie serving tray or just piece of cut plastic. It took me no more than an hour of shopping, and maybe 30 minutes at the most to assemble. What a deal!
Wednesday, December 06, 2006
Chipotle Peppers
Chipotle peppers, (not chipotel as some say, or habanero vs. habañero-the latter is wrong, one of my pet peeves-and I've even seen this spelling on hot sauce bottles in the grocery store!), are one of the great flavoring agents, if you like hot. Both dried and in adobo, these are one of the wonders of Mexican cooking. However, for ease of use and versatility, stick with those in adobo. These will add a smoky, spicy all around delicious flavor to almost any dish where a little heat is desired.
You can buy these in the can at most supermarkets nowadays, otherwise try your ethnic grocer or specialty shop. Once you open a can, they can keep in your refrigerator for months. I usually blend them up with a hand blender and use a little at a time-they are quite hot. Try these ideas:
You can buy these in the can at most supermarkets nowadays, otherwise try your ethnic grocer or specialty shop. Once you open a can, they can keep in your refrigerator for months. I usually blend them up with a hand blender and use a little at a time-they are quite hot. Try these ideas:
- Add a spoonful to some mayonnaise and put it on a pulled pork, chicken, or any other kind of sandwich you like.
- Add some to your favorite chili recipe; or add to black, red, or pinto beans, along with some fresh chopped tomatoes or canned tomatoes, for an instant spicy bean dish.
- Add a dash to your favorite barbecue sauce or your own barbeque sauce recipe for a fiery sauce.
- Blend with fresh chopped tomatoes and salt for a quick salsa.
Saturday, November 25, 2006
Panko Bread Crumbs
Use Panko Bread crumbs to replace bread crumbs called for in almost any recipe. Panko crumbs are bright white, large and flaky.
If you like the herb flavor of some of the other brands that come in a can, just add your own Italian Seasoning, fresh chopped parsley, or whatever else you like. The big advantage of these crumbs is that they are big, flaky, and crunchy, and will far outperform any other bread crumb when it comes to adding crunchiness and texture to your food.
Panko is actually a Japanese product and can be found in many asian grocers, but their availability is becoming more common as we continue to internationalize. Look for them in large supermarkets and specialty shops as well. Regular and honey are the two types usually found, the honey ones having just a touch of sweetness.
Before using, be sure to season will salt and pepper until you can taste it. For breading meats or chicken, I like to add some chopped parsley and fresh grated parmesan. Dip your meats in flour, then some beaten egg, and finally the seasoned breadcrumbs, before frying in oil. They are a great addtion to meatballs, crabcakes, meatloaf, and anything else that requires bread crumbs.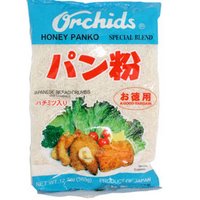
If you like the herb flavor of some of the other brands that come in a can, just add your own Italian Seasoning, fresh chopped parsley, or whatever else you like. The big advantage of these crumbs is that they are big, flaky, and crunchy, and will far outperform any other bread crumb when it comes to adding crunchiness and texture to your food.
Panko is actually a Japanese product and can be found in many asian grocers, but their availability is becoming more common as we continue to internationalize. Look for them in large supermarkets and specialty shops as well. Regular and honey are the two types usually found, the honey ones having just a touch of sweetness.

Before using, be sure to season will salt and pepper until you can taste it. For breading meats or chicken, I like to add some chopped parsley and fresh grated parmesan. Dip your meats in flour, then some beaten egg, and finally the seasoned breadcrumbs, before frying in oil. They are a great addtion to meatballs, crabcakes, meatloaf, and anything else that requires bread crumbs.

Wednesday, November 15, 2006
Better, Cheaper, Faster
This is about where you can get kitchen equipment that is better quality, lower in price, and often longer-lasting than what you will find in your regular Bed, Bath & Beyond; Linens & Things; or department store.
Our first stop is JB Prince. JB Prince is a chef's paradise, the mecca of all culinary stores. I have not had the pleasure of visiting the actual store in New York, but you can find just about anything online. I highly recommend the saute pans listed in an earlier post. They also have a great selection of hard-to-find pastry and cookbooks, many imported from Europe. They don't require you buy wholesale, open an account, or have a minimum order.
Another good source for cookware, books, and especially pastry equipment (they carry all the Matfer-Bourgeat stuff from France) is restaurantsource.com. They are more commercial oriented. However, they have great prices for pastry and chocolate equipment.
While Jessica's Biscuit has a good selection of cookbooks and good prices, I still can't get some of the European titles from them. I have also found better prices on half.com for many of the cookbooks I am interested in or have purchased. And I have seen better prices for some popular cookbooks like The Silver Spoon and the new Gourmet Cookbook at Costco. I have not tried shopping at Kitchen Arts & Letters in New York, but they are supposed to have a great selection.
Monday, November 13, 2006
That Orange Stuff in Your Cheese
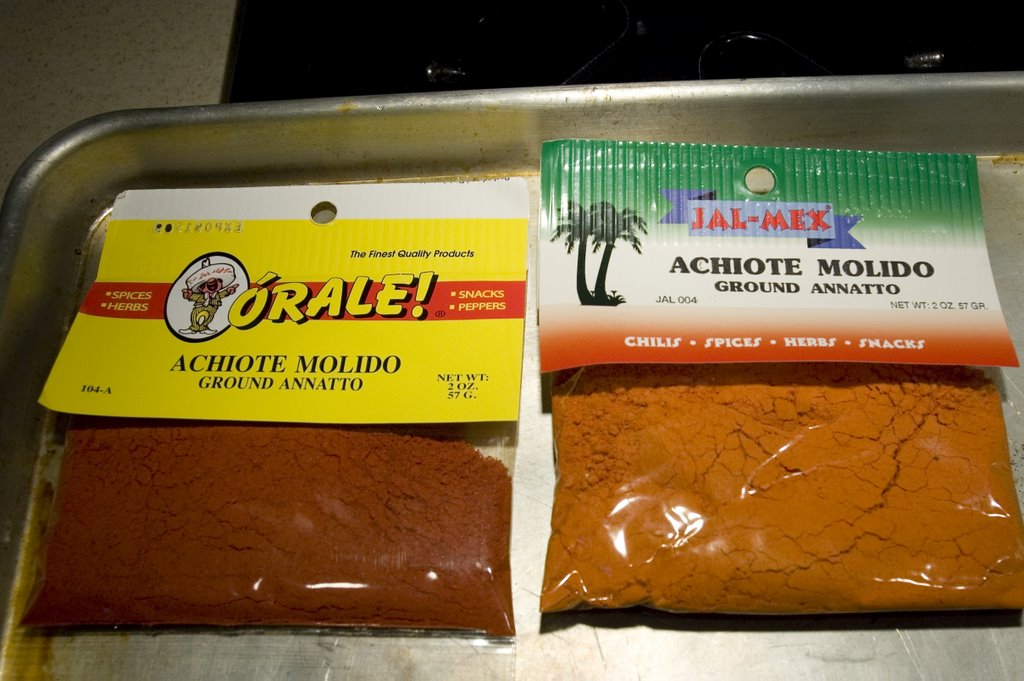
Today's food item is achiote, known in English as Annatto-you'll most likely find it as an ingredient in your cheddar cheese, it's the stuff that makes it orange. Wikipedia does a good job providing a description, so I won't go into it here, just read this. This spice is found in Mexican, Central American, and some South American cuisines, especially Ecuador. It is not spicy and is a great flavor enhancer for cooking light-that is, lots of flavor but low in fat.
Achiote is great for flavoring fish, pork and chicken. I took this photo having noticed the large variation in color between these two packages. I don't know if it's the brand or just the batch, but the more usual color is the left one that says "Orale" brand. They both smelled the same and worked just fine in my recipe so I guess there's not difference.
My favorite use for this spice is to make a paste for seasoning fish, pork and chicken. When I lived in Nicaragua, in the open market they would have 2-3 foot high cones of this paste out on a table, or little baggie portions available for purchase. The recipe I use here is an adaptation from Rick Bayless.
3 Tbs. Achiote Powder
6 garlic cloves
Apple Cider Vinegar
2 tsp allspice
pinch salt
1 tsp pepper
Moisten the achiote with the vinegar, put in blender or small chopper with garlic, allspice, black pepper and salt and blend until you have a thick paste. You can add a little water or more vinegar if it is too thick. The paste will keep several months under refrigeration.
To use, spread it out on pork chops, pork roast, chicken, or fish and grill or saute as you would regularly. If it's too thick, thin with a little water, lime or orange juice.
Friday, November 10, 2006
Bread Baking for Four Year Olds Continued

The bread was punched down about 11:45. I let it sit 15 minutes, then folded it and let it rise again. Here is a photo just before it was going to be baked. Very nice rise, silky feel, looking good. I heated my oven to 400, oops, recipe said 450. I used a 10 qt. Le Creuset pot to bake in, that I preheated as the recipe indicated.
Since I noticed my mistake, I immediately upped the oven to 450 degrees upon putting the bread in. I left it in for 30 minutes at this temperature, then removed the lid and allowed it to go another 15 minutes exactly.
I removed the bread and let it cool. Here's a photo of the finished product.
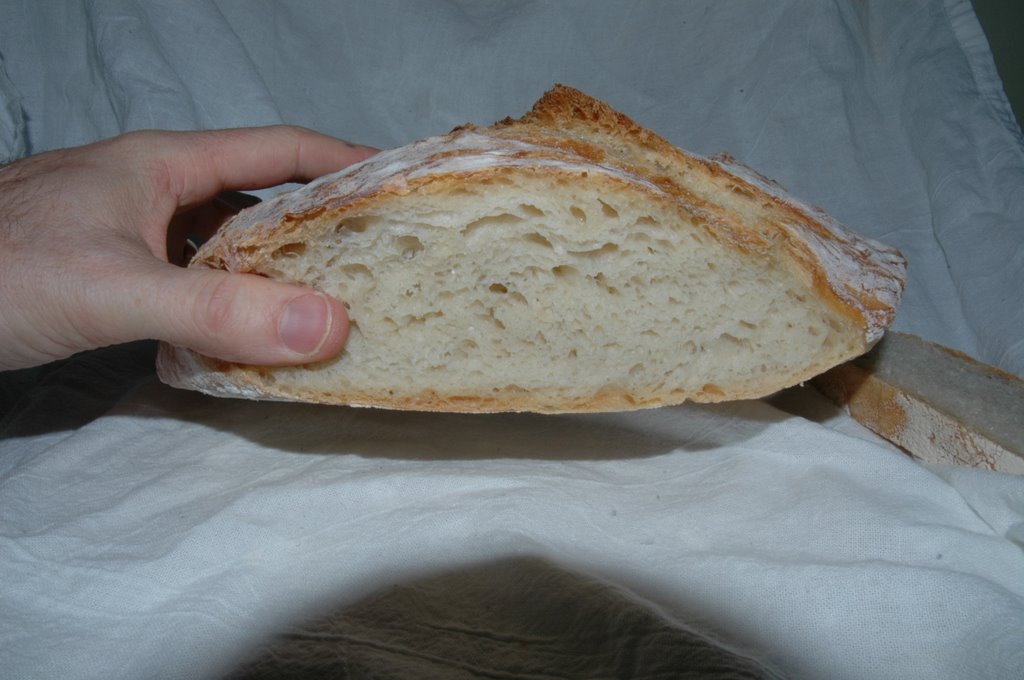 The bread was perfect, with a chewy golden crust, good yeasty tang, and nice irregular crumb with nice pockets of air. This is indeed an excellent method; only next time, I think I'll double the recipe so I get a bigger loaf, since we've already eaten almost half of this one.
Bread Baking for Four Year Olds Continued
It's 7 am now, my bread dough has been sitting overnight in a relatively cool kitchen, probably a few degrees below the recommended 70 degrees, but it's working. As you can see from the photo below, yeast activity has begun to produce some bubbles and the size of the dough has increased. 
I turned my oven on to 250 degrees and will leave the dough several more hours then. There'll be another update when it's ready for the punching down and the final rise.

I turned my oven on to 250 degrees and will leave the dough several more hours then. There'll be another update when it's ready for the punching down and the final rise.
Thursday, November 09, 2006
Bread Baking for Four Year Olds
Baking bread is one of my favorite activities but for some reason I just don't get around to it enough. Recently, the New York Times published an article on bread baking without kneading. I have begun my attempt today and this is the first shot of my dough. Here is the recipe.

Tomorrow morning I will be back with another shot, and by 3 pm it will be ready to bake.

Tomorrow morning I will be back with another shot, and by 3 pm it will be ready to bake.
Help, My Fruits Are Rotting!
For those of us living within a few hours drive of a pick-your-own style farm, as a result of our overzealous efforts we often arrive home with more fruit than we know what to do with. In May, it's strawberries. June and July bring blackberries. August is for Raspberries, and September through October and even early November, a variety of apples become available.
Berries are some of the most quickly perishable fruits, so if you don't eat them, you have to do something with them quickly. Making pie is one option, but pies don't freeze well and so you still have to eat them. A better option is making fruit compote. Canning and jarring are yet another option, but we won't discuss those here as I'm looking to offer a quicker, simpler solution that's almost as good. You'll need the following:
To make compote, start with equal parts sugar and water. Mix gently to moisten all the sugar. We are making what's known as a simple syrup here, which is simply a sugar syrup. Start with low heat and let all the sugar dissolve. You want to make sure the sides of the pot are clean and no stray sugar grains are left out, otherwise your syrup will recrystallize in a few days and you will end up with rock candy. Use either a moistened pastry brush to brush down the sides of the pot as the syrup boils, or put a tight-fitting lid on the pot; the steam will gather on the lid and sides and wash down the pot for you. Make sure all the sugar has dissolved before moving on to the next stage.
Have at the ready recently washed and hulled strawberries, or blackberries, or raspberries, whatever is available at the time. Since strawberries are much less delicate than black or raspberries, you can add them right when the syrup is ready and even cook them a little while over low heat until they are just soft. Blackberries and raspberries will soften very quickly, so once you have added them to the hot syrup you should almost immediately cool your pot and cooking liquid in the ice bath. You can add a teaspoon or two of vanilla and a squeeze of lemon juice when they're done.
Now you want to lower your cooking pot into that bowl of ice water you have ready. This will cool the berries quickly and prevent them from overcooking. Stir gently with the pot submerged in the water until the berries and syrup have cooled substantially.
You can now store your compote for several weeks in the refrigerator. You can use the berries on toast, rewarm it for crepes or to put on pancakes or waffles, mix it in a fruit salad with other fruits, or serve over ice cream. And if you have syrup left over, strain it and keep it for ice cream, to decorate a plate for cakes or pies, or again for waffles or pancakes. It will keep for a long time.
My preference for apples is to make apple sauce. It keeps along time and also has many uses. To make apple sauce you'll need:
Once your apples are cooked to the stage you like them-some people enjoy chunky style apple sauce-add sugar to taste, a little lemon juice, and spices if desired. Let cool and store in containers in the refrigerator.
Apple sauce is great with plain yogurt, pork chops, or just on its own! Enjoy!
Berries are some of the most quickly perishable fruits, so if you don't eat them, you have to do something with them quickly. Making pie is one option, but pies don't freeze well and so you still have to eat them. A better option is making fruit compote. Canning and jarring are yet another option, but we won't discuss those here as I'm looking to offer a quicker, simpler solution that's almost as good. You'll need the following:
- sugar
- water
- lemon juice and or vanilla
- large bowl of ice water
- medium size pot for cooking berries
To make compote, start with equal parts sugar and water. Mix gently to moisten all the sugar. We are making what's known as a simple syrup here, which is simply a sugar syrup. Start with low heat and let all the sugar dissolve. You want to make sure the sides of the pot are clean and no stray sugar grains are left out, otherwise your syrup will recrystallize in a few days and you will end up with rock candy. Use either a moistened pastry brush to brush down the sides of the pot as the syrup boils, or put a tight-fitting lid on the pot; the steam will gather on the lid and sides and wash down the pot for you. Make sure all the sugar has dissolved before moving on to the next stage.
Have at the ready recently washed and hulled strawberries, or blackberries, or raspberries, whatever is available at the time. Since strawberries are much less delicate than black or raspberries, you can add them right when the syrup is ready and even cook them a little while over low heat until they are just soft. Blackberries and raspberries will soften very quickly, so once you have added them to the hot syrup you should almost immediately cool your pot and cooking liquid in the ice bath. You can add a teaspoon or two of vanilla and a squeeze of lemon juice when they're done.
Now you want to lower your cooking pot into that bowl of ice water you have ready. This will cool the berries quickly and prevent them from overcooking. Stir gently with the pot submerged in the water until the berries and syrup have cooled substantially.
You can now store your compote for several weeks in the refrigerator. You can use the berries on toast, rewarm it for crepes or to put on pancakes or waffles, mix it in a fruit salad with other fruits, or serve over ice cream. And if you have syrup left over, strain it and keep it for ice cream, to decorate a plate for cakes or pies, or again for waffles or pancakes. It will keep for a long time.
My preference for apples is to make apple sauce. It keeps along time and also has many uses. To make apple sauce you'll need:
- Apples
- Sugar
- A vegetable peeler
- A large pot
- Paring knife
- Lemon juice
- Nutmeg, cinnamon (optional)
Once your apples are cooked to the stage you like them-some people enjoy chunky style apple sauce-add sugar to taste, a little lemon juice, and spices if desired. Let cool and store in containers in the refrigerator.
Apple sauce is great with plain yogurt, pork chops, or just on its own! Enjoy!
Wednesday, November 08, 2006
Blanching Vegetables-What's That?
I like to always have some fresh cooked vegetables on hand to go along with my lunch or dinner. Usually I have some broccoli or asparagus, sometimes green beans or baby bok choy. If I don't eat them as a side dish, I can usually find a way to incorporate them into another new dish.
Blanching is an important and useful technique to know because it will help keep that green veggie you don't know what to do with from going bad so quickly, make it more eye appealing, and make it much tastier than if you were to eat it raw.
Get a large pot of water going, usually 3-4 quarts, more if you are blanching a large quantity of something. Add enough salt so that you can taste it in the water-not quite as salty as ocean water but you should be able to taste it. Before you add anything, the water should be at a rolling boil.
While your water is heating up, cut your broccoli into equal size pieces, large or small as you like, trim the ends from your asparagus or green beans, or make a cross shaped cut in the bottom of your bok choy.
Add your vegetables to the water and you will see they turn a beatiful bright green. That is the salt doing its job. Broccoli usually takes about 3-4 minutes after the water returns to a full boil; it should just be "fork tender"-you should be able to cut it with a fork with a little pressure-when it's ready. Asparagus is the same. Green beans usually take around 8-10 minutes; they shouldn't squeak in your teeth when you bite them. Bok choy will not become fork tender as it's a little more fibrous and you'll need to saute it anyway before you serve it, but it should become noticeably softer. Just don't cook it until it's completely limp.
Once your vegetable is done, pull it out quickly and if you don't plan to eat it right away, either run cold water over it, or better yet put it in ice water. In restaurant speak, this is called "shocking" it. It should be completely submerged in water and a good amount of ice until it is cold all the way through. This will stop the cooking process. Then you can easily store your fresh veggie away 3-4 days. All you have to do is pop it in the microwave a minute or two, top it with a little salt and pepper and butter if you like, and it's ready to go.
DIY Salad Dressings
Making your own Salad Dressing is easy, so much better than the stuff you find at the store, and allows you to make a much wider variety of flavors than available even on your supermarket shelf. We'll start with the basics and later I'll move in to more specific recipes.
Basically, to make a good salad dressing you want to form an emulsion. That is, the fat particles (read oil) are broken up into microscopic pieces spread equally among the other liquid (mostly water), in the case of salad dressing, ususally vinegar. The stuff you buy at the supermarket, with the exception of Ranch dressing, usually has stabilizers and/or emulsifiers in it to keep the oil and vinegar together for at least a few minutes when you shake it up. You can make your own dressing that is far better and creamier than the stuff you buy at the store-sans emulsifiers.
To start you need either a regular blender or a hand blender. Basic ingredients are:
Vinegar of choice (I would recommend a basic red or white wine vinegar here)
Dijon Mustard
Canola, Soy or other Veggie Oil
2-3 cloves garlic
1 Shallot
Water-the secret ingredient
Tabasco Sauce
Worcestershire Sauce
Fresh Thyme
Salt & Pepper
Put about a 1/4 cup vinegar, a tablespoon of mustard, the garlic, the shallot and a pinch of salt in the blender. Blend. Salt won't dissolve in oil so that's why you add it here first.
Slowly drizzle the oil into the running blender. Watch it closely and you will see it blend in and thicken if an emulsion is forming properly. With a little practice, you'll be able to know it's going well not just by how it looks, but by the sound it makes. If you add the oil too quickly, or you add too much, the emulsion will break and you will have water and oil. If it's going right, it will start to thicken like mayonnaise and you will notice. The trick here is patience-add that oil slowly!
Once it starts getting thick, add a teaspoon of water at a time to keep it at the right consistency. It shouldn't be thick like mayonnaise, and it shouldn't be so thin that it just runs off your salad greens. Salad dressing is a sauce; I like to apply the chef's rule for other sauces to dressing too. It should just coat the back of a spoon and should leave a line when you run your finger over the back.
You can add the fresh thyme if you wish at any point in the process. To finish it off, a dash of tabasco and a dash or Worcestershire will give it pep. You shouldn't be able to taste either of these, but you should notice the difference before adding and after. Your dressing will keep several days if not longer in the refrigerator. You may notice it starting to separate after a few days. That's ok, it just won't be as creamy as when you first made it. Shake it up hard before serving and it's ready to use.
The International Pantry
What to have on hand to cook a wide variety of dishes. Some basic ingredients:
Chipotles in Adobo-Mexico
Sesame Oil-China
Coconut Milk-Thailand
Curry Powder-India, Southeast Asia
Sri Racha
Cilantro-Mexico, Thailand
Dijon Mustard-France
Fish Sauce-Thailand
Tamarind Paste-Thailand
Garbanzo Flour-India
Mustard Seed-India
Garlic-Everywhere
This list includes some of the main, and most familiar, flavor components of a variety of cuisines.
Tuesday, November 07, 2006
The Best Sautee Pan
You don't need an All-Clad or other expensive pan to cook a steak or a good piece of fish like a pro. And you definitely do not need teflon-which, when heated to high heat, can even be hazardous to your health. However, you do need a pan you won't find at Bed, Bath & Beyond or any other regular home suppply store. What you need is this.
No, this is not a product promotion. These no-brand pans, usually from France, are the next best thing to a stainless steel flat top found on high-end home stoves or in a restaurant kitchen. This is a pan made of pure steel, nothing else, and it gets very hot. This is just what you need to get that tasty sear on the outside of a steak or good piece of fish.
A few things you should know about these pans. As you can see from the link, they're cheap, around 20 bucks. But they will last forever if treated right, just like a good cast iron pan. They weigh almost as much, I think the small size shown weighs probably over 5 pounds.
You don't want to wash these in soap and water. What you want to do is build up a good seasoning on the pan.
Before first use, coat it with a light coat of vegetable oil and put it in a 400 degree oven for about 30 minutes. You can continue to do this every few weeks. When you do use it, use only a little oil on the bottom, or coat whatever your cooking (the steak or the fish) with a little oil, salt and pepper of course, and put it in the pan once the pan is nearly smoking hot. Don't move the food; let it develop that nice tasty browning. Turn when ready to the other side. To finish a piece of steak or fish cooked in the pan but not done through to the middle how you might like it, just stick the whole thing, pan and all, into your preheated oven.
When you're done cooking, let the pan cool on the stove for a while. Then add some kosher salt and wipe well with either an old rag you don't care about, or with a few paper towels. Use the salt to scrub off any cooked on bits of food. You don't want to get the pan wet with water or it will rust, and even less so with soap and water, or you'll remove the seasoning you want to build up. The longer you use it the better it will get, and you will soon notice that you only need a minimal amount of oil to get a nice browning, and absolutely nothing will stick to it if you do it right.
This is not a pan to use for making pan sauces or anything else. Save the pan only for cooking fish or meats, nothing else.
Monday, November 06, 2006
Local Foods
A good article in the Washington Post recently discussed the growth of locally grown foods. I fully agree with the article's assertion that the use of local produce by restaurants and consumers is a trend that benefits the environment, small businesses, and society as a whole. I believe this is a trend that should continue to be pursued in many other sectors of the economy, which might bring us back to a more local economy based on regional trade.
While free trade has unarguably brought a great deal of benefits, it is also a harbinger of doom for the planet. Recently another article was published stating humans may no longer have fish stocks for consumption by the year 2048. If we were to really start eating locally, people living inland from the coasts would have to consume only freshwater fish as well as other local sources of protein. Of course, this would mean-heaven forbid!-regional cuisine would again become stronger. There would be a drop off in the continuing trend toward standardization of everything across the country and across the planet.
However, as others in the blogosphere have pointed out, what do you eat in the winter if you live in Ohio, or Maine? If we were to carry this to an extreme, some of the only available foods in these areas might be potatoes and other storable root crops, some of the long-lasting varieties of apple, dried fish and meats, and canned goods made from local produce. Who has time to do all this, or can food if you live in a one bedroom or studio apartment? Given our current economic and social paradigm, the only practical solution is to buy what you can that is grown and produced locally, supplementing it with proteins and other sources from your regular grocery store.
Drawing this idea out a bit more, a return to regional economies would demand a move away from the increasingly urbanized world we live in. Instead of people continuing to produce less and less of their own food and rely more and more on multinational corporations and large food producers, society as a whole would have to move toward small-scale agricultural production on an individual or family level. Small plots of land would be required, perhaps backyard plots like those often seen throughout Europe, or communtiy gardens. Such a trend would be encouraging to see, but is still just a small blip on the horizon, which could easily be snuffed out by current forces.
Always Have-On-Hand Items
This is a list of what I call "flavoring agents" that you should try to always have on hand. Most of these can be used to make what might just be a dull meal into an exciting one. And most of the time, they will keep it healthy too. All of these ingredients will last at least several weeks, if not months in your refrigerator or pantry, so it's easy to keep them on hand:
Anchovies
Ancho Chiles
Balsamic Vinegar
Capers
Chipotle Chiles in Adobo
Canned Coconut Milk
Garlic Confit (recipe below)
Fresh Peppercorns
Dijon Mustard (my personal preference is for whole grain)
Kalamata Olives
Kosher Salt
Tabasco Sauce
Parmesan Cheese
I'll cover each of these ingredients one by one in future blogs. All of these items you can find at the supermarket, with the exception of what I call Garlic Confit. And please, don't buy the abhorrent stuff in the green can they shamelessly call Parmesan Cheese; splurge for the real thing-believe me, it's worth it.
Garlic confit is just a fancy way of saying garlic cooked and preserved in oil. I prefer to use EVOO (extra virgin olive oil). If you can find it, buy a good size jar of freshly peeled garlic cloves. Trim off the little hard ends with a paring knife. If you can't find the jar, just buy about 4-5 heads of fresh garlic, peel it and separate the cloves. Put all the garlic in a saucepan, and add enough EVOO to just cover-at least a cup or more. I like to add some extra oil because then I have some tasty garlic infused oil as well that is great for flavoring dishes. Set the pan on the stove on low, and let it simmer away for at least an hour, checking frequently. You could also put it in a low oven around 250-300 degrees for a couple of hours. The oil should just percolate slowly. The garlic should be just gently browned when it's done and soft enough to spread on bread-which isn't a bad idea in itself. If the garlic burns it will turn bitter; you'll have to throw out your efforts and start over. You can now store this garlic several weeks in the refrigerator, and instead of having to chop garlic every time a recipe calls for chopped garlic, just pull out what you need and mash it with the back of a knife on a cutting board, and add it to your recipe. It's a fine substitute, and tends to have a mellower, slightly warmer flavor than plain old chopped garlic.
Anchovies
Ancho Chiles
Balsamic Vinegar
Capers
Chipotle Chiles in Adobo
Canned Coconut Milk
Garlic Confit (recipe below)
Fresh Peppercorns
Dijon Mustard (my personal preference is for whole grain)
Kalamata Olives
Kosher Salt
Tabasco Sauce
Parmesan Cheese
I'll cover each of these ingredients one by one in future blogs. All of these items you can find at the supermarket, with the exception of what I call Garlic Confit. And please, don't buy the abhorrent stuff in the green can they shamelessly call Parmesan Cheese; splurge for the real thing-believe me, it's worth it.
Garlic confit is just a fancy way of saying garlic cooked and preserved in oil. I prefer to use EVOO (extra virgin olive oil). If you can find it, buy a good size jar of freshly peeled garlic cloves. Trim off the little hard ends with a paring knife. If you can't find the jar, just buy about 4-5 heads of fresh garlic, peel it and separate the cloves. Put all the garlic in a saucepan, and add enough EVOO to just cover-at least a cup or more. I like to add some extra oil because then I have some tasty garlic infused oil as well that is great for flavoring dishes. Set the pan on the stove on low, and let it simmer away for at least an hour, checking frequently. You could also put it in a low oven around 250-300 degrees for a couple of hours. The oil should just percolate slowly. The garlic should be just gently browned
 when it's done and soft enough to spread on bread-which isn't a bad idea in itself. If the garlic burns it will turn bitter; you'll have to throw out your efforts and start over. You can now store this garlic several weeks in the refrigerator, and instead of having to chop garlic every time a recipe calls for chopped garlic, just pull out what you need and mash it with the back of a knife on a cutting board, and add it to your recipe. It's a fine substitute, and tends to have a mellower, slightly warmer flavor than plain old chopped garlic.
Sunday, November 05, 2006
Make-at-Home Food Staples
My intention here is to provide a basic guide to prepping healthy foods, so that you can have a meal ready in 20 minutes or less. My personal tendency is to steer wide and clear of most processed or ready-made foods, with a few exceptions, mostly for items you just can't make at home. And while eating out is great, especially if you can afford it, it's rarely a healthy option. This guide is especially useful if you're at home with two kids and your hands are full keeping them entertained.
I try to keep some basics on hand that I can use as the bases for a number of dishes. The handiest way to do is this is to have an additional small freezer or extra refrigerator. Once a months I go out and buy the following items and prepare them, cool them, and freeze them in quart containers:
Beans I also use as an accompaniment with rice and fish or chicken. They can be pureed and a dash of cream and some stock added to make a soup. I like to have several kinds on hand for variety. For a quick spicy dish add a little chipotle pepper in adobo (you can find them on the shelf in the Latin Section), some queso cotija (Mexican cheese), and serve with rice.
Garbanzo beans-another versatile, healthy item with multiple uses. What first comes to mind for me is Hummus-just puree some garbanzos, add a good amount of Tahini (this is a sesame paste found in Middle Eastern groceries or the ME section of your grocery store), fresh or roasted garlic (see my other entry on Always Have on Hand Items), lemon juice, and serve. Always make sure you don't add too much water at first or it will be too thin-and also make sure it's not too thick or you'll burn up your blender quickly. You can also make this in a food processor-save your blender.
For a real comfort food winter dish, try opening up a can of good italian pomodoro tomatoes (or some of your frozen sauce I'll tell you how to make below), add some water or stock, and a portion of your garbanzos. The rind from a good hunk of parmesan is a real flavor booster here-add it to your soup and let it simmer away. Add some small noodles (broken up angel hair or another fine noodle) near the end, some fresh chopped parsley if desired, and there you have a basic Minestrone soup. Some fresh grated parmesan works well to top it off. I saw Parmesan rinds at my local Whole Foods market the other day, but I prefer to buy the big pieces they sell at Costco and save the rinds (it's a lot cheaper too).
Or try tossing up some room temp Garbanzos with a can of good tuna, preferably in Olive Oil, some salt, pepper and lemon juice, for a healthy simple salad.
A short tangent here-if you buy your Parmesan or other cheese at Costco (or elsewhere, for that matter), to keep it fresh break it or cut it up into several pieces that will last no more than a week. Wrap each one individually in Saran wrap and unwrap as needed. And of course, save the Parmesan rinds for soups and sauces.
Moving on to tomato sauce, I like to buy the big cans of Italian Pomodoro at Costco, or Pomi brand that comes in the cardboard boxes at Whole Foods or other markets if you're lucky enough to be able to find them. (No, this isn't a product placement). I really find the brand of tomato makes a big difference-avoid the American stuff (Del Monte, etc.) if you can. The citric acid comes through way too strong. I dice up three or four large onions and saute these until translucent, add 15-20 cloves of chopped garlic or prepped garlic (again, see my other entry on Always Have on Hand Items), some fresh thyme, some fennel seeds if you like the peppiness they'll give the sauce, and then add two of these large cans of tomatoes. You can add a can or two of tomato paste if you like as well. And if you have the Parmesan rinds, this will add flavor like no other. I like to go light on the herbs here so that I can have a versatile sauce when I actually decide to make something with it, so go with your preferences here. I like to let it simmer one and a half to two hours, then let it cool. This makes about 7.5 to 8 quarts of sauce you can freeze. Half quart containers will serve 2-3, while a quart container is just about right for 4-5 people.
You can use this sauce directly over pasta-just microwave your frozen portion directly and serve over past of your choice. Or saute some Italian sausage, add the sauce and let it simmer a while. Saute some mini portabellos, a little garlic, and add to your sauce. Use red pepper flakes, mashed anchovies, and capers for Pasta a'la'Puttanesca. Use it for the soup as described above. Saute mushrooms, red bell peppers, add some diced celery and some sauteed chicken and make a quick chicken cacciatore (ok, so it's not a twenty minute dish-but you will have saved yourself 1-2 hours by having the sauce prepared ahead of time), oregano, rosemary, or whatever you like! The list goes on.
Finally, soups. Soups freeze beautifully-though I do find they need a second blending once they have been thawed out and reheated to restore the consistency to them. If you like a touch of cream in your soup, which adds an elegant finish, don't add the cream before freezing. Save it for when you the soup is hot and ready to be eaten.
I like to have on hand, especially during the winter months, a bright, belly-warming carrot soup. This is my personal preference and of course you can do your own (suggestions below), but here's the quick recipe. Put 2 portion onions (or leeks, if you want to go more "gourmet" or a mix of both), 2 portion carrots, and 1 portion celery in a large pot. Add 1 potato, some chopped garlic. Add water or stock as you wish. Add a few cloves of garlic, some fresh or dried thyme. Allow to simmer until the carrots and potatoes are very tender.
Blend your soup with an immersion blender or in a regular blender. Careful with hot liquids, blend small amounts at a time. Allow to cool and freeze in quart containers or half quart containers, depending on your needs.
For butternut squash soup, reduce the carrots by half and add butternut squash pieces to replace the reduced amount of carrots, and then some. For asparagus or broccoli soup, prepare as directed above without the carrots (they'll spoil the nice green color). Add the green vegetable during the last 2-4 minutes of cooking and cook until just done. Blend and chill in an ice bath immediately if you want to maintain the nice green color and you're not eating the soup right away. To do the ice bath, you'll need a large bowl of ice water, and a slightly smaller bowl for your soup. Once blended, quickly put the soup in the smaller bowl and submerge in the ice bath. Stir until chilled.
Occasionally you will find that after freezing the soup you lose the original smooth texture it had when it was just prepared. To remedy this, just put it in the blender or use your immersion blender once thawed and ready to heat up.
I try to keep some basics on hand that I can use as the bases for a number of dishes. The handiest way to do is this is to have an additional small freezer or extra refrigerator. Once a months I go out and buy the following items and prepare them, cool them, and freeze them in quart containers:
- Lentils
- Pinto, Black, or other beans
- Garbanzo Beans (or you can buy canned but it's a lot cheaper to just cook them and they freeze well)
- Tomato Sauce
- Carrot, Split Pea, or other Soup
Beans I also use as an accompaniment with rice and fish or chicken. They can be pureed and a dash of cream and some stock added to make a soup. I like to have several kinds on hand for variety. For a quick spicy dish add a little chipotle pepper in adobo (you can find them on the shelf in the Latin Section), some queso cotija (Mexican cheese), and serve with rice.
Garbanzo beans-another versatile, healthy item with multiple uses. What first comes to mind for me is Hummus-just puree some garbanzos, add a good amount of Tahini (this is a sesame paste found in Middle Eastern groceries or the ME section of your grocery store), fresh or roasted garlic (see my other entry on Always Have on Hand Items), lemon juice, and serve. Always make sure you don't add too much water at first or it will be too thin-and also make sure it's not too thick or you'll burn up your blender quickly. You can also make this in a food processor-save your blender.
For a real comfort food winter dish, try opening up a can of good italian pomodoro tomatoes (or some of your frozen sauce I'll tell you how to make below), add some water or stock, and a portion of your garbanzos. The rind from a good hunk of parmesan is a real flavor booster here-add it to your soup and let it simmer away. Add some small noodles (broken up angel hair or another fine noodle) near the end, some fresh chopped parsley if desired, and there you have a basic Minestrone soup. Some fresh grated parmesan works well to top it off. I saw Parmesan rinds at my local Whole Foods market the other day, but I prefer to buy the big pieces they sell at Costco and save the rinds (it's a lot cheaper too).
Or try tossing up some room temp Garbanzos with a can of good tuna, preferably in Olive Oil, some salt, pepper and lemon juice, for a healthy simple salad.
A short tangent here-if you buy your Parmesan or other cheese at Costco (or elsewhere, for that matter), to keep it fresh break it or cut it up into several pieces that will last no more than a week. Wrap each one individually in Saran wrap and unwrap as needed. And of course, save the Parmesan rinds for soups and sauces.
Moving on to tomato sauce, I like to buy the big cans of Italian Pomodoro at Costco, or Pomi
 brand that comes in the cardboard boxes at Whole Foods or other markets if you're lucky enough to be able to find them. (No, this isn't a product placement). I really find the brand of tomato makes a big difference-avoid the American stuff (Del Monte, etc.) if you can. The citric acid comes through way too strong. I dice up three or four large onions and saute these until translucent, add 15-20 cloves of chopped garlic or prepped garlic (again, see my other entry on Always Have on Hand Items), some fresh thyme, some fennel seeds if you like the peppiness they'll give the sauce, and then add two of these large cans of tomatoes. You can add a can or two of tomato paste if you like as well. And if you have the Parmesan rinds, this will add flavor like no other. I like to go light on the herbs here so that I can have a versatile sauce when I actually decide to make something with it, so go with your preferences here. I like to let it simmer one and a half to two hours, then let it cool. This makes about 7.5 to 8 quarts of sauce you can freeze. Half quart containers will serve 2-3, while a quart container is just about right for 4-5 people.
You can use this sauce directly over pasta-just microwave your frozen portion directly and serve over past of your choice. Or saute some Italian sausage, add the sauce and let it simmer a while. Saute some mini portabellos, a little garlic, and add to your sauce. Use red pepper flakes, mashed anchovies, and capers for Pasta a'la'Puttanesca. Use it for the soup as described above. Saute mushrooms, red bell peppers, add some diced celery and some sauteed chicken and make a quick chicken cacciatore (ok, so it's not a twenty minute dish-but you will have saved yourself 1-2 hours by having the sauce prepared ahead of time), oregano, rosemary, or whatever you like! The list goes on.
Finally, soups. Soups freeze beautifully-though I do find they need a second blending once they have been thawed out and reheated to restore the consistency to them. If you like a touch of cream in your soup, which adds an elegant finish, don't add the cream before freezing. Save it for when you the soup is hot and ready to be eaten.
I like to have on hand, especially during the winter months, a bright, belly-warming carrot soup. This is my personal preference and of course you can do your own (suggestions below), but here's the quick recipe. Put 2 portion onions (or leeks, if you want to go more "gourmet" or a mix of both), 2 portion carrots, and 1 portion celery in a large pot. Add 1 potato, some chopped garlic. Add water or stock as you wish. Add a few cloves of garlic, some fresh or dried thyme. Allow to simmer until the carrots and potatoes are very tender.
Blend your soup with an immersion blender or in a regular blender. Careful with hot liquids, blend small amounts at a time. Allow to cool and freeze in quart containers or half quart containers, depending on your needs.
For butternut squash soup, reduce the carrots by half and add butternut squash pieces to replace the reduced amount of carrots, and then some. For asparagus or broccoli soup, prepare as directed above without the carrots (they'll spoil the nice green color). Add the green vegetable during the last 2-4 minutes of cooking and cook until just done. Blend and chill in an ice bath immediately if you want to maintain the nice green color and you're not eating the soup right away. To do the ice bath, you'll need a large bowl of ice water, and a slightly smaller bowl for your soup. Once blended, quickly put the soup in the smaller bowl and submerge in the ice bath. Stir until chilled.
Occasionally you will find that after freezing the soup you lose the original smooth texture it had when it was just prepared. To remedy this, just put it in the blender or use your immersion blender once thawed and ready to heat up.
Subscribe to:
Posts (Atom)
